
In today’s content-saturated digital world, information isn’t enough it must be presented engagingly. That’s where a well-designed timeline comes in.
Whether you are showcasing company history, a product roadmap, or a personal journey, visualizing events chronologically is the most effective way to communicate complex information quickly.
But how do you implement this feature without writing hundreds of lines of code or relying on outdated tools?
If you use the world’s most popular Content Management System, WordPress, and the leading drag-and-drop page builder, Elementor, the answer is simple and powerful.
This comprehensive guide will show you exactly how to create a timeline in WordPress using Elementor and dedicated timeline plugins, ensuring your content is not just informative but truly interactive.
WordPress is the backbone of the web, powering over of all websites globally. Meanwhile, Elementor, with its 10+ million active installations, has made professional web design accessible to everyone.
By combining the flexibility of WordPress with the visual editor of Elementor, you gain unmatched control over your timeline design. We’re going beyond basic list styling to create fully responsive, interactive visual histories that will keep your readers engaged and scrolling.
Key Takeaways
- Build dynamic timelines that captivate user interest instantly.
- Leverage Elementor addons for pixel-perfect design control.
- Easily transform blog posts into a chronological story flow.
- Choose the perfect vertical or horizontal layout for content.
- Implement powerful SEO optimization to drive organic traffic.
Why Visual Timelines Boost User Engagement
A timeline is more than just a list of dates; it’s a powerful narrative device. Humans process visual information much faster than plain text, and a graphical display of historical or future events drastically improves comprehension and retention. When a reader lands on your page, a timeline instantly provides context and a compelling flow for your story.
Core Use Cases for an Interactive Timeline
Understanding when and where to add a timeline in WordPress is key to maximizing its impact. Here are the most common and effective applications:
- Company History & Milestones: This is perhaps the most classic use case. Showcase your brand’s evolution, from founding dates and early product launches to major achievements and acquisitions. This builds trust and communicates stability to potential clients or investors.
- Product Roadmaps: For SaaS, tech, or development companies, an interactive timeline on WordPress is crucial. It clearly outlines future features, bug fixes, and development phases. This transparency boosts customer confidence and manages expectations effectively.
- Educational Content and E-learning: Present complex historical periods, scientific processes, or literary chronologies in a digestible, linear format. This makes learning less intimidating and more effective.
- Blog Post Chronology (Post Timeline): Instead of a standard blog archive, imagine using a WordPress event timeline to display related posts or a multi-part series in the order they were published or should be read. This is a brilliant way to keep users on your site longer.
- Personal & Professional CVs: Create a visually dynamic, vertical timeline WordPress to highlight your career progression, roles, achievements, and educational background, turning a static resume into an engaging portfolio piece.
Research has shown that content featuring strong visual elements, such as data visualizations, generates over 94% more views than content without them (HubSpot). A timeline is the ultimate form of data visualization for chronological information.
How to Create a Timeline in WordPress: 2 Methods
In this guide, we’ll show you two methods to create a timeline in WordPress with Elementor. The first method uses Elementor’s default widgets without any additional plugins. The second method uses the HT Mega Elementor Addons plugin for faster, more professional results. Lets start.
Method 1: Creating a Basic Timeline Using Elementor (Without Plugins)
Before we dive into the advanced plugin method, let’s explore how to create a simple timeline using only Elementor’s built-in features. This approach works if you need a basic timeline and want to avoid installing additional plugins.
However, I’ll be honest with you, this method has limitations. It’s time-consuming, requires manual coding or clever widget manipulation, and lacks the flexibility of dedicated timeline widgets. But it’s worth understanding this approach to appreciate why plugins like HT Mega make life so much easier.
1. Create a New Page
Start by logging into your WordPress Dashboard. Navigate to Pages → Add New, give your page a title, and click the Edit with Elementor button to launch the Elementor editor.
2. Choose Your Layout Structure
Click the plus icon to add a new section. You’ll want to select a column structure that supports your timeline design. For a vertical timeline, a two-column layout works well—one column for dates and one for content. For a horizontal approach, you might use multiple columns in a single row.
3. Build Timeline Elements Manually
Here’s where things get creative (and a bit tedious):
- Use the Icon Box widget to create timeline points or markers
- Add Text Editor widgets for your timeline content descriptions
- Insert Divider widgets or use custom CSS to create connecting lines between events
- Add Image widgets if you want visuals alongside your timeline points
You’ll need to manually position each element, adjust spacing, and ensure everything aligns properly. This requires patience and a good eye for design.
4. Styling Your Timeline
Once your structure is in place, customize the appearance:
- Adjust colors to match your brand
- Set consistent typography across all elements
- Fine-tune spacing and padding
- Add background colors to content boxes
- Ensure responsive behavior by checking mobile and tablet views
Pros and Cons of This Method
Pros:
- No additional plugins required
- Complete creative control
- Lightweight (no extra plugin overhead)
Cons:
- Extremely time-consuming
- Difficult to update or modify later
- Limited design options without custom CSS
- Not easily scalable for long timelines
- Challenging to make truly responsive
Unless you only need a very simple 3-4 event timeline, I recommend using a dedicated plugin instead. Which brings us to…
Method 2: Creating a Timeline with HT Mega Elementor Addons (Recommended)
Now let’s explore the much better approach: using HT Mega Elementor Addons. This plugin transforms timeline creation from a tedious manual process into a quick, enjoyable task.
Why Use HT Mega for Timelines?
HT Mega offers significant advantages:
- Pre-built timeline widgets that work right out of the box
- Extensive customization options without touching code
- Multiple layout styles (horizontal, vertical, zigzag)
- Responsive designs that automatically adapt to all screen sizes
- Dynamic content that can pull from your posts automatically
- Easy updates when you need to modify or add timeline events
Prerequisites
Before we begin, make sure you have:
- WordPress is installed and running
- Elementor (free version works fine, though Pro offers additional benefits)
- HT Mega Elementor Addons plugin
Install HT Mega Elementor Addons
If you haven’t installed HT Mega yet, here’s how:
- Go to your WordPress Dashboard
- Navigate to Plugins → Add New
- Search for “HT Mega Elementor Addons”
- Click Install Now and then Activate
- You’ll see a welcome screen with an overview of available widgets
HT Mega includes dozens of widgets beyond just timelines, accordions, tabs, testimonials, pricing tables, and much more. It’s genuinely one of the most valuable Elementor add-on plugins available.
Now, let’s create some timelines!
Option A: Creating a Horizontal Timeline with Post Timeline Widget
Horizontal timelines work beautifully for displaying shorter chronological sequences like project phases, product development stages, or quarterly achievements. They create a left-to-right flow that feels natural and engaging. Lets learn how to create horizontal timeline with post timeline widget.
1. Create or Edit Your Page
Navigate to the page where you want to add your timeline. If it’s a new page, go to Pages → Add New. If you’re editing an existing page, simply select it from your Pages list. Click Edit with Elementor to open the page builder.
2. Add the Post Timeline Widget
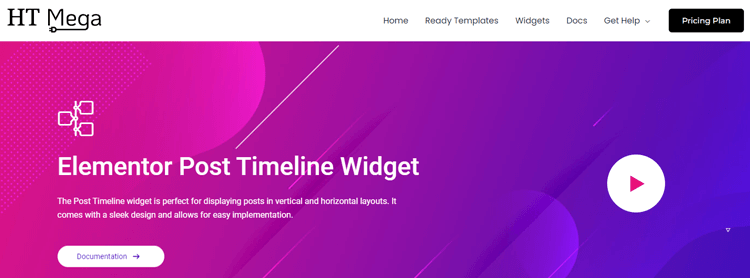
In the Elementor left sidebar, you’ll see a search box at the top of the widgets panel. Type “Post Timeline” to filter the available widgets. Look for the Elementor Post Timeline Widget (Horizontal) from HT Mega.
Drag and drop this widget into your desired section. You’ll immediately see a default timeline appear, which looks pretty impressive, right?
3. Configure Timeline Settings
Click on the widget to access its settings. You’ll see several tabs, but let’s start with the Content tab:
Post Query Settings:
- Post Type: Choose whether to display posts, pages, or custom post types
- Posts Per Page: Set how many timeline items you want to show
- Order By: Select ordering criteria (date, title, random, etc.)
- Order: Choose ascending or descending order
- Categories/Tags: Filter posts by specific categories or tags if needed
Display Options:
- Toggle whether to show featured images
- Enable/disable post dates
- Show or hide post titles
- Display excerpt length (if you want brief descriptions)
- Add a “Read More” button if desired
4. Customize Timeline Style
Now switch to the Style tab where the real magic happens:
Timeline Line:
- Adjust the color of the connecting line
- Set the line width and style (solid, dashed, dotted)
- Control line height
Timeline Navigation:
- Style the navigation arrows
- Change arrow colors and sizes
- Adjust arrow positioning
Date/Time Styling:
- Choose typography for dates
- Set date background colors
- Add borders or shadows to date boxes
Title Customization:
- Select fonts and sizes for titles
- Set title colors and hover effects
- Adjust title spacing
Content Box Styling:
- Customize background colors for content areas
- Add borders, shadows, and rounded corners
- Set padding and margins
- Style the excerpt text
Image Settings:
- Control image sizes and positioning
- Add borders or effects to images
- Set image hover animations
5. Adjust Layout Options
Fine-tune your timeline’s appearance:
- Set spacing between timeline items for optimal readability
- Adjust column gaps if using multiple rows
- Configure responsive settings—you can set different layouts for desktop, tablet, and mobile
6. Preview and Publish
Before publishing, always preview your timeline:
- Click the responsive mode icon in the bottom-left
- Check how it looks on desktop, tablet, and mobile
- Make any necessary adjustments
- When satisfied, click Publish or Update
Your horizontal timeline is now live!
Option B: Creating a Vertical Timeline with Vertical Timeline Widget
Vertical timelines are ideal for longer chronological stories, such as company histories, biographical timelines, year-in-review summaries, or detailed project progressions. They provide excellent readability and work exceptionally well on mobile devices.
1. Add the Vertical Timeline Widget
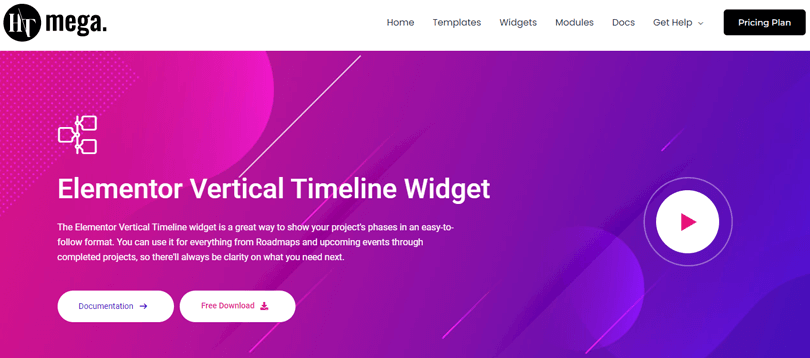
Open your page in Elementor and search for “Vertical Timeline” in the widgets panel. Drag the Elementor Vertical Timeline Widget from HT Mega into your section.
Unlike the horizontal widget that pulls from posts, the vertical timeline often allows both manual item addition and dynamic post pulling, giving you maximum flexibility.
2. Add Timeline Items
In the Content tab, you’ll see options for adding timeline events:
Manual Timeline Items: You can add individual timeline entries one by one. For each item, you’ll configure:
- Date/Time: Enter the event date or time period
- Title: Add a headline for the event
- Description: Write a detailed description of what happened
- Image: Upload a relevant image (optional but recommended)
- Icon: Choose an icon to represent the event visually
Click “Add Item” to create additional timeline entries. You can reorder items by dragging them up or down in the list.
Dynamic Post Timeline: Alternatively, you can pull posts dynamically (similar to the horizontal widget):
- Select post type
- Set number of posts
- Filter by category or tag
- Choose ordering options
3. Style Your Vertical Timeline
Switch to the Style tab to customize every visual aspect:
Timeline Line:
- Choose line color and width
- Select line style (solid, dashed, dotted)
- Adjust line position (center, left, right)
Timeline Points/Nodes:
- Customize the circular markers on the timeline
- Change marker size, color, and border
- Add icons inside markers
- Style marker hover effects
Date Box Styling:
- Set typography for dates
- Choose background colors for date containers
- Add borders, shadows, or rounded corners
- Position dates (inline or separate box)
Content Box Design:
- Customize background colors and images
- Add borders with adjustable colors and widths
- Apply box shadows for depth
- Set border radius for rounded corners
- Adjust padding and margins
Typography:
- Select fonts for titles and descriptions
- Set font sizes, weights, and line heights
- Choose text colors and hover colors
- Adjust letter spacing for refinement
Color Schemes:
- Create consistent color palettes
- Set primary and accent colors
- Define hover state colors
- Ensure proper contrast for readability
Visual Effects:
- Add box shadows for depth
- Apply gradient backgrounds
- Create hover animations
- Add entrance animations
4. Configure Advanced Settings
Layout Options:
- Alternate Layout: Content alternates between left and right sides of the timeline
- Single-Sided Layout: All content appears on one side (left or right)
- Center Aligned: Timeline runs down the center with symmetrical content
Animation Effects:
- Choose entrance animations (fade in, slide up, zoom in, etc.)
- Set animation delays for staggered effects
- Control animation duration
Spacing:
- Adjust vertical spacing between timeline items
- Set padding inside content boxes
- Control margins around the entire timeline
Responsive Behavior:
- Define how the timeline adapts on tablets
- Set mobile-specific layouts (usually switches to single-sided)
- Adjust font sizes for different screen sizes
5. Preview and Adjust
Always test your timeline thoroughly:
- Preview on desktop to ensure proper alignment
- Check tablet view for readability
- Test mobile view—vertical timelines usually excel here
- Verify that images load properly
- Ensure text is readable at all sizes
- Test any animations or hover effects
Make refinements until everything looks perfect, then publish your page.
Tips for Creating Effective Timelines
Want your timeline to truly shine? Follow these best practices:
1. Keep Content Concise: Nobody wants to read paragraphs on a timeline. Keep descriptions brief 2-4 sentences maximum per event. Focus on the most important details.
2. Use Consistent Formatting: Maintain consistency throughout your timeline. Use the same date format consistently and maintain similar title lengths. This creates a polished, professional appearance.
3. Choose Contrasting Colors: Ensure your timeline is easy to read with proper contrast between text and backgrounds. Dark text on light backgrounds is most effective. Always prioritize readability over style.
4. Add Visual Elements: Include relevant images and icons for each event. Visual elements make your timeline more engaging and help categorize different types of events effectively.
5. Ensure Mobile Responsiveness: Always preview your timeline on mobile devices before publishing. Adjust font sizes and ensure images scale properly. Vertical timelines typically perform better on mobile.
6. Use Meaningful Dates and Labels: Use clear, precise dates and include context in your titles. Instead of “Product Launch,” write “Product Launch: XYZ Mobile App” for immediate clarity.
7. Test User Experience: Put yourself in your visitor’s shoes. Can they quickly understand the timeline flow? Is the information presented logically? Test thoroughly before publishing.
Frequently Asked Questions
Can I create a timeline in WordPress without a plugin?
Yes, for a basic static version, you can use the native Elementor Icon List widget combined with clever divider and border styling. However, this method lacks dynamic content and advanced customization features.
What is the difference between a vertical and horizontal timeline?
A vertical timeline displays events from top to bottom, making it ideal for history or roadmaps on long pages. A horizontal timeline displays events side by side, often used as a slider, and is best suited for clean, space-saving chronological displays.
Is the Elementor timeline responsive on mobile devices?
Yes. High-quality Elementor timeline widgets (like those in HT Mega) are designed to be fully responsive. Horizontal timelines usually stack vertically on mobile, ensuring a clean, readable flow without horizontal scrolling.
How can I display my blog posts in chronological order on a timeline?
Use an Elementor widget like the HT Mega Post Timeline. This widget automatically queries your existing WordPress posts by their published date and dynamically displays them as cards along the timeline structure.
Does using a timeline addon slow down my WordPress site?
Quality add-ons are optimized, but any extra plugin adds overhead. Use a solution like HT Mega that allows you to disable unused widgets, ensuring only the necessary timeline code loads and minimizing performance impact.
Why should I choose Elementor for building a WordPress timeline?
Elementor offers a superior drag-and-drop visual interface for pixel-perfect design control. Dedicated Elementor timeline addons provide far more sophisticated layout options, deep styling, and animation features than standard Gutenberg blocks.
Conclusion
You now have a complete, actionable strategy for how to create a timeline in WordPress that is both visually stunning and highly optimized for search engines. By choosing a dedicated Elementor timeline plugin, you bypass the need for complicated CSS and shortcode implementations, allowing you to focus on the storytelling itself.
Implementing an interactive timeline immediately elevates your website’s professionalism, making complex company narratives and detailed project roadmaps more intuitive and easier to follow. Start experimenting with different layouts today; your audience will appreciate the clarity.
Need help fine-tuning the timeline layout in WordPress or setting up the dynamic WordPress event timeline for your existing blog posts? Let me know, and we can dive into specific plugin settings!