The Elementor Vertical Timeline widget is a great way to show your project’s phases in an easy-to-follow format. You can use it for everything from Roadmaps and upcoming events through completed projects, so there’ll always be clarity on what you need next.
How to use a Vertical Timeline Widget of HTMega Addons
You can see the below video to get an insight into how you can use the Vertical Timeline Widget to create beautiful designs. Or you can follow the documentation whichever you find convenient.
Steps of adding Vertical Timeline Widget
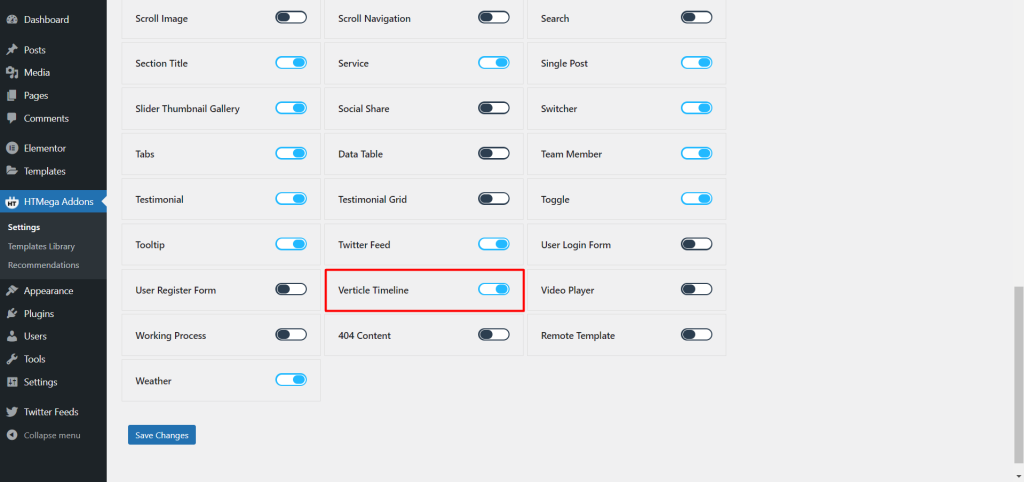
Go to WordPress Dashboard > HTMega Addons > Settings > Elements. From the list of Elements, turn ON the “Vertical Timeline” widget.
Step 1: How to Enable Vertical Timeline?
Step 2: How to use the Vertical Timeline Widget?
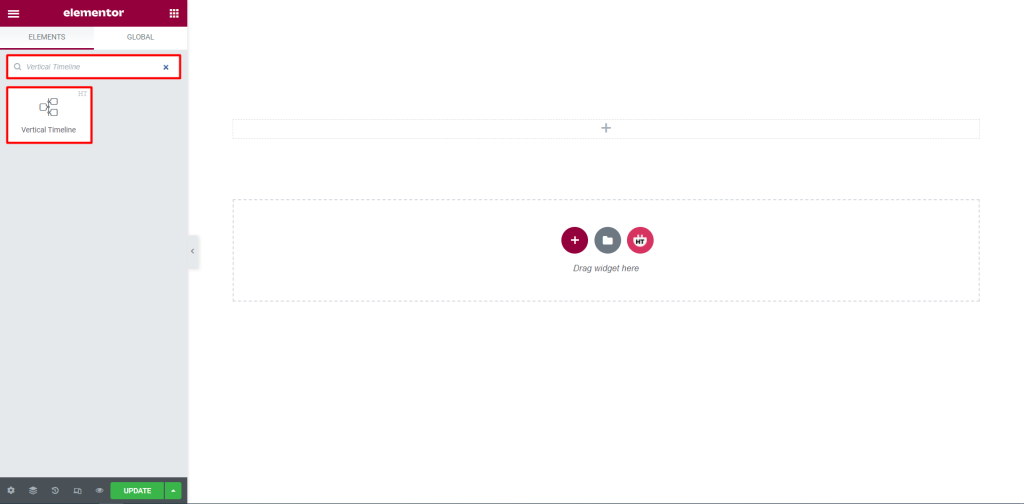
To add the Vertical Timeline Widget, search by “Vertical Timeline” and use the widget that has the “HT badge”
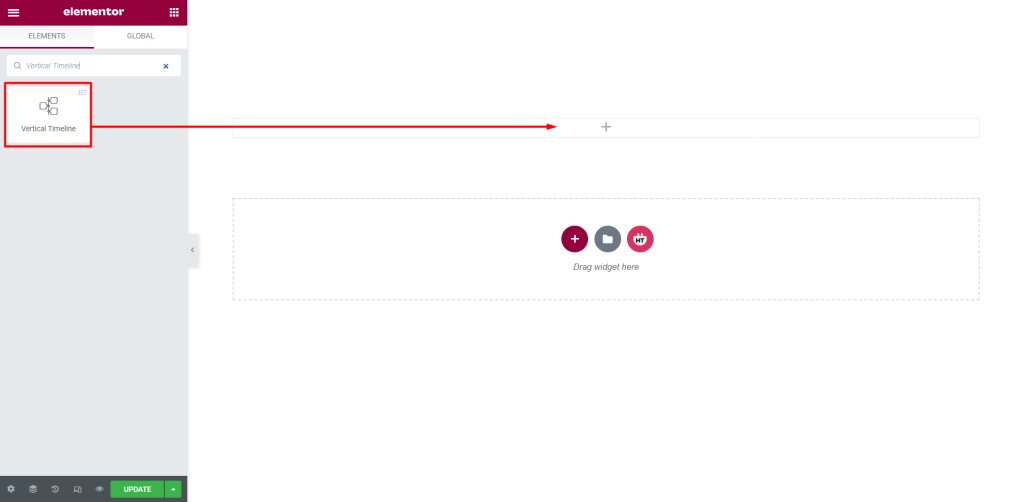
Drag and drop the HT Mega Vertical Timeline widget onto the Page Template.
Step 3: How to customize the Vertical Timeline Widget?
Content :
Vertical Timeline Layout: You have 4 different Layouts of Vertical Timeline. You can choose your layout from the selected options.
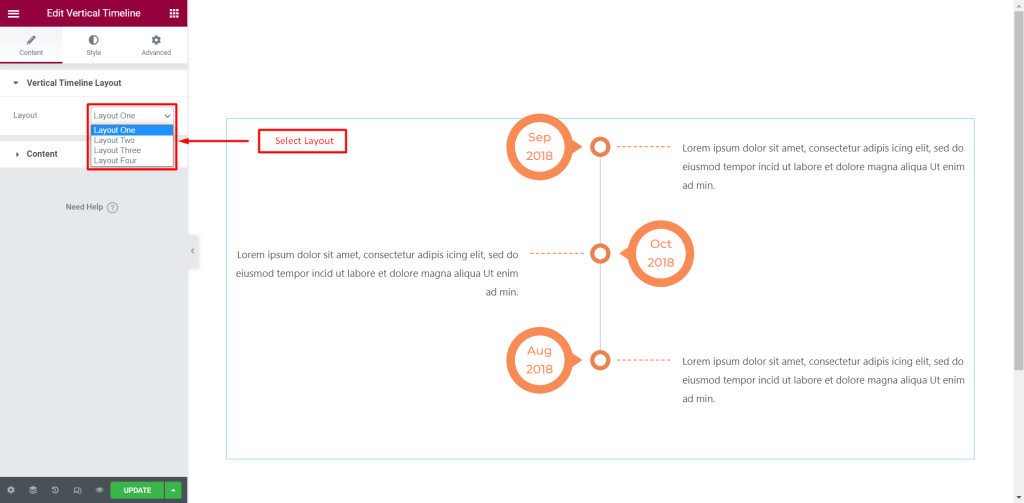
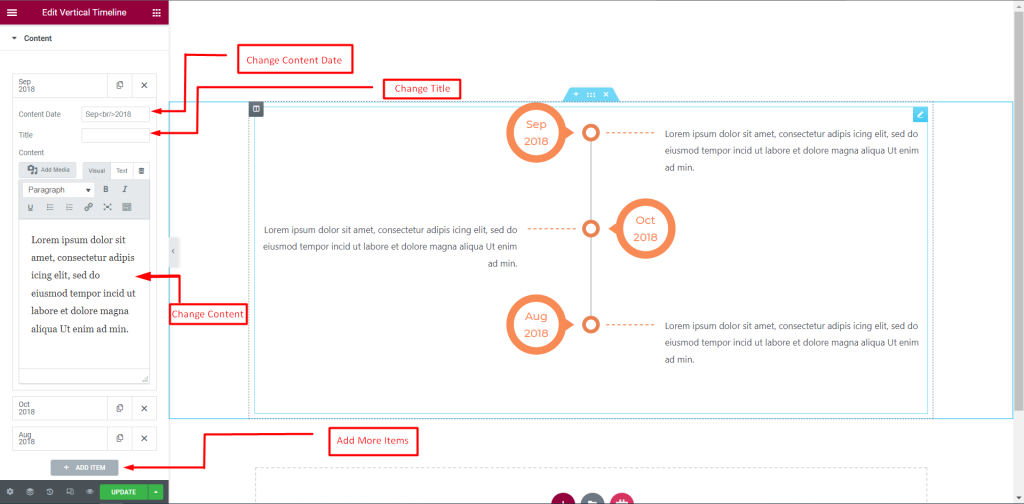
Content: You can change the Content Date, Title, Content, and Add More Item according to your needs
How to customize the Vertical Timeline Widget style
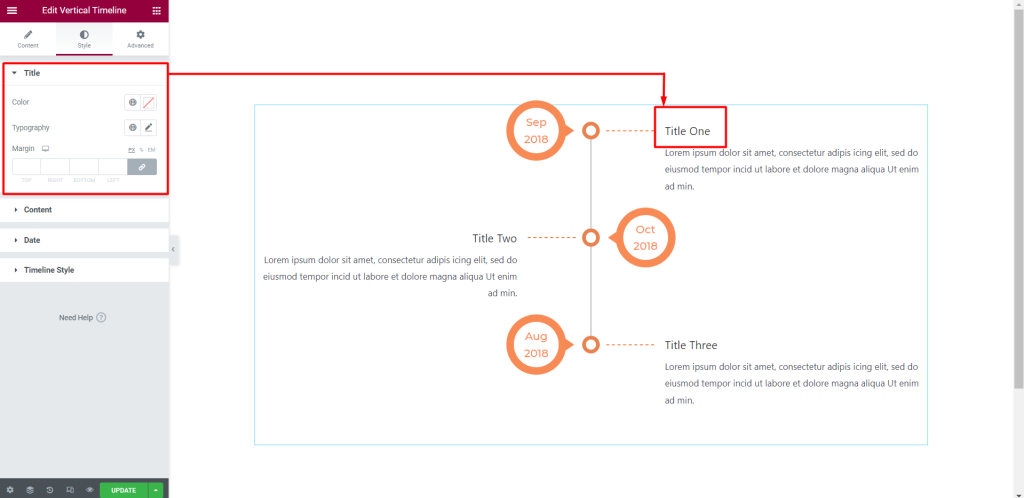
Title: You can customize the style of the Title as you like
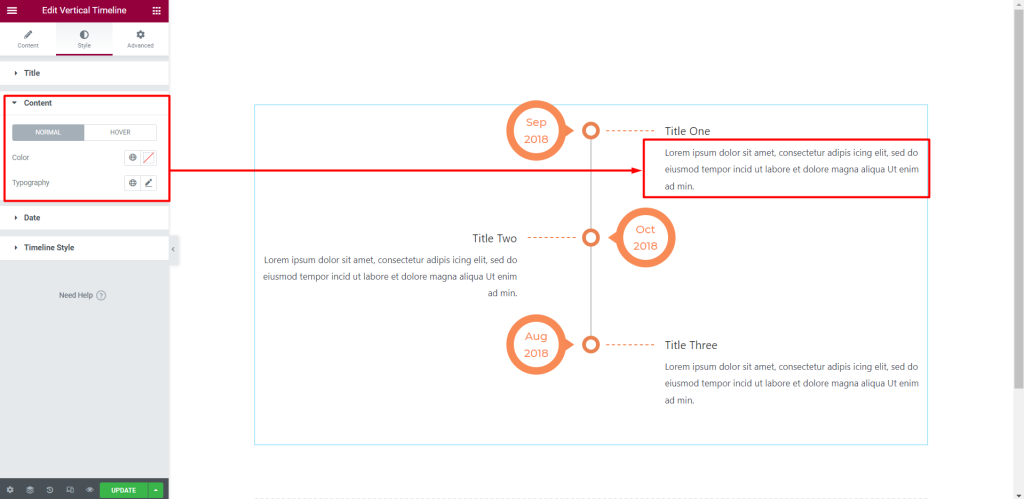
Content: You can customize the style of the Content as you like
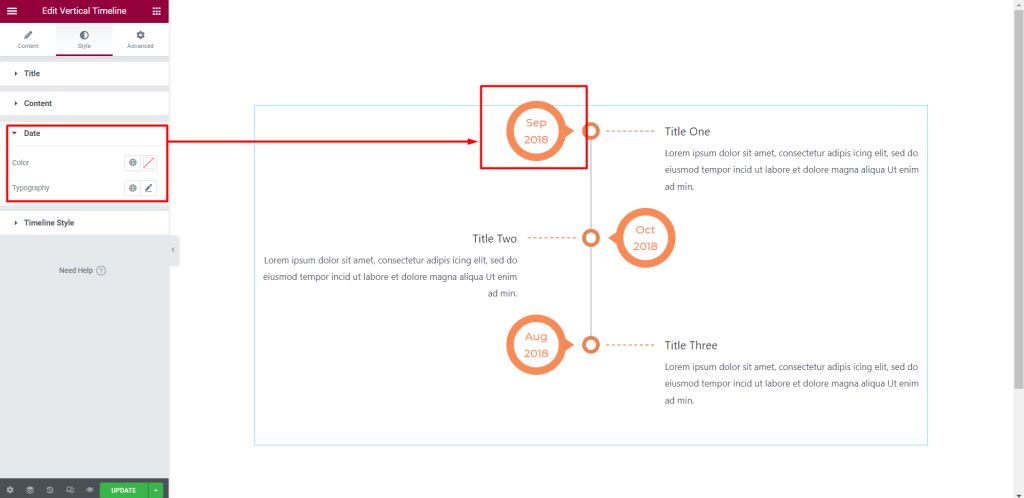
Date: You can customize the style of the Date as you like
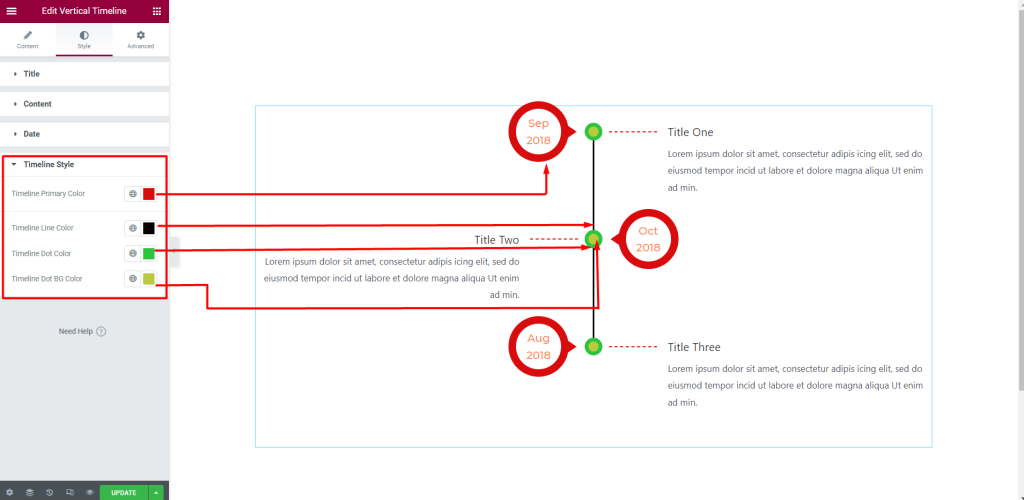
Timeline Style: You can customize the style of the Timeline Style as you like
Usage Examples
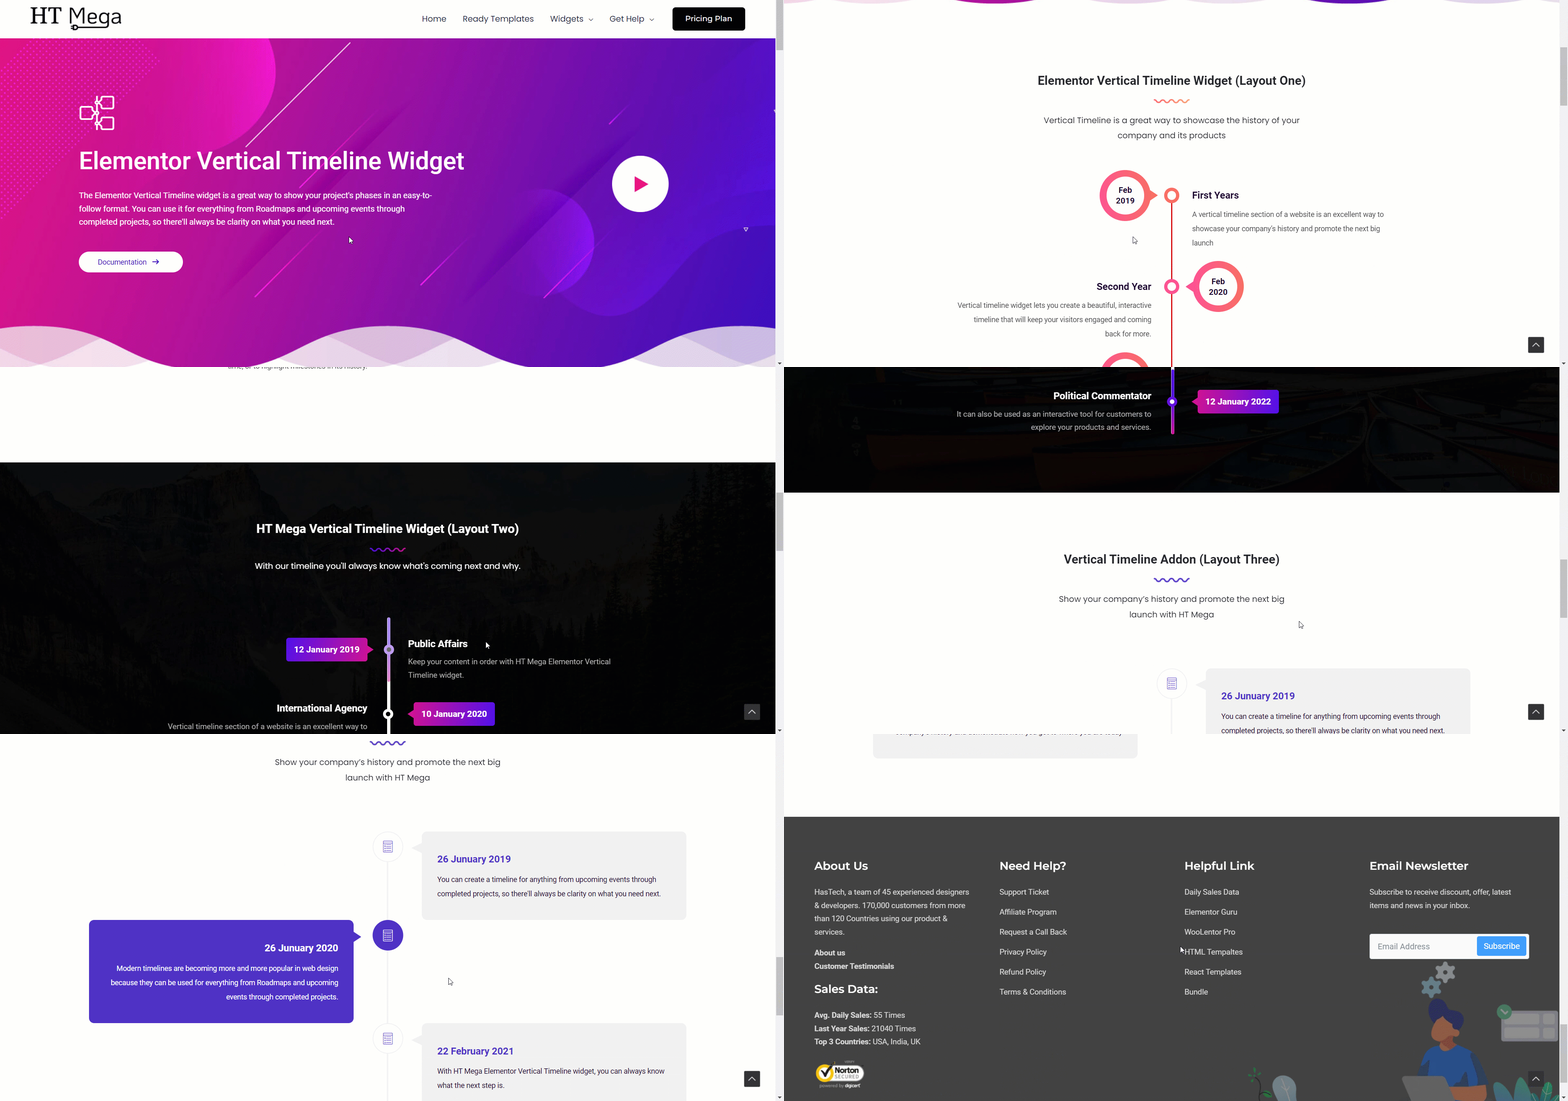
Here are some live use cases for the Vertical Timeline widget. Follow this link to see more Demos
Was this helpful?
Good job! Please give your positive feedback
How could we improve this post? Please Help us.
