Explore the guide for the HT Mega Post Featured Image Widget, expertly designed for smooth integration with Elementor Page Builder. Seamlessly incorporate this widget into Elementor, offering a flexible and stylish solution to effortlessly manage and showcase your Post Featured Image. Immerse yourself in a space where handling featured images is a creative and adaptable experience, enhancing your content’s overall design.
Steps of adding Post Featured Image Widget
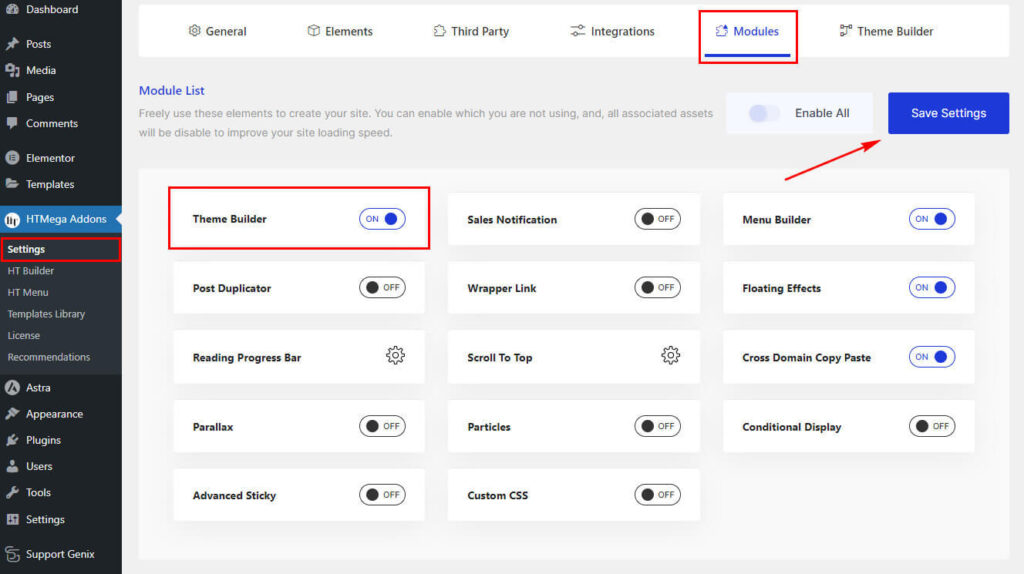
Make sure you have enabled the Theme Builder Module from the Module Settings.
Step 1: How to Enable Post Featured Image Widget?
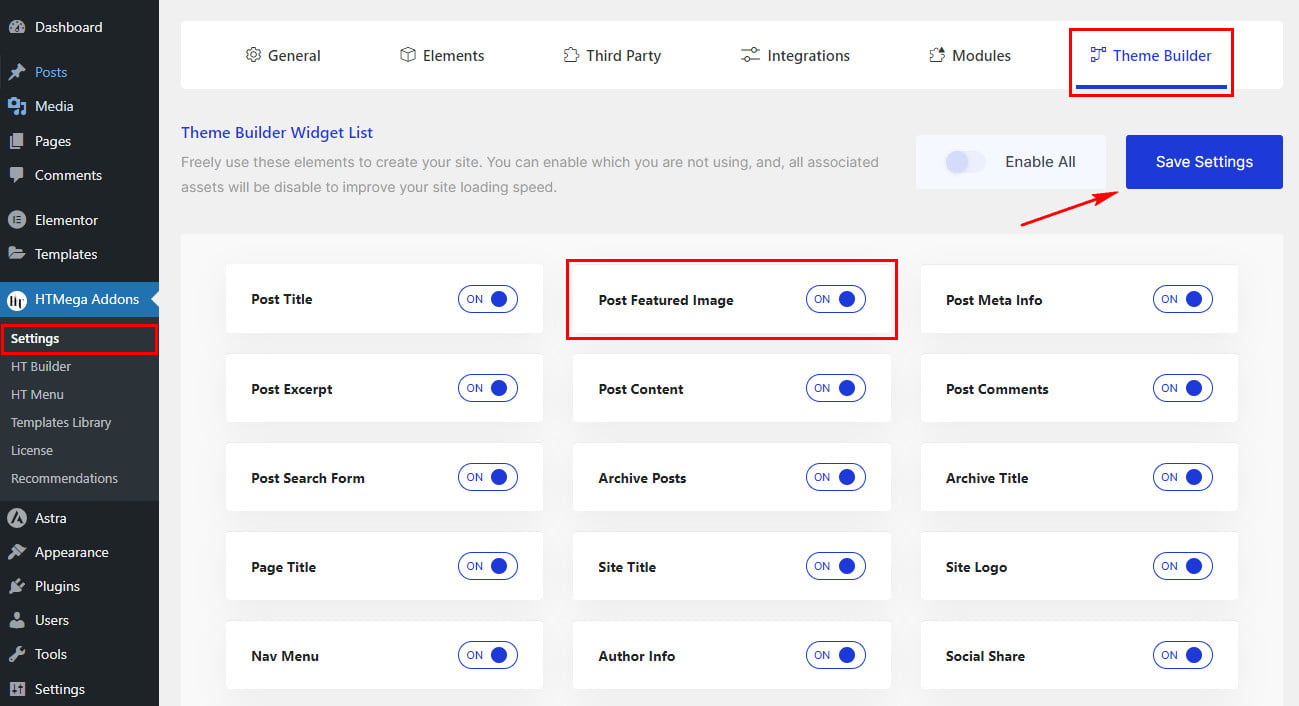
Go to WordPress Dashboard > HTMega Addons > Settings > Theme Builder. From the list of Elements, enable the “Post Featured Image” widget.
Step 2: How to Use the Post Featured Image Widget?
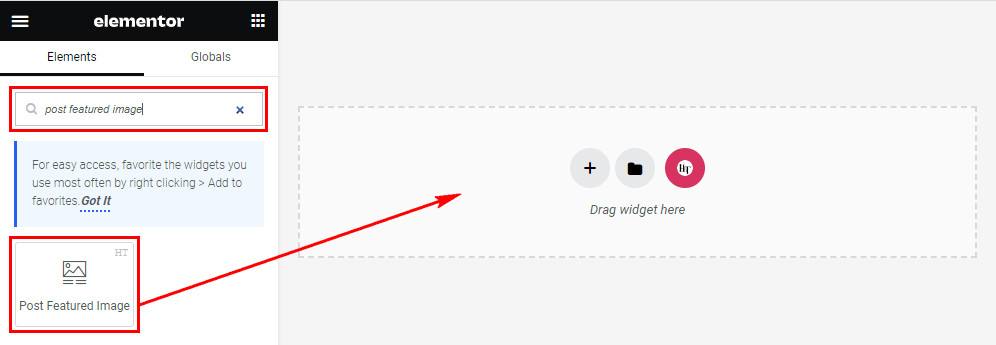
Once you’ve enabled the Post Featured Image widget in the theme builder settings, access the Elementor editor for your chosen page. Search for “Post Featured Image” and then drag and drop the widget with the “HT” badge.
Step 3: How to customize the Elementor Post Featured Image Widget?
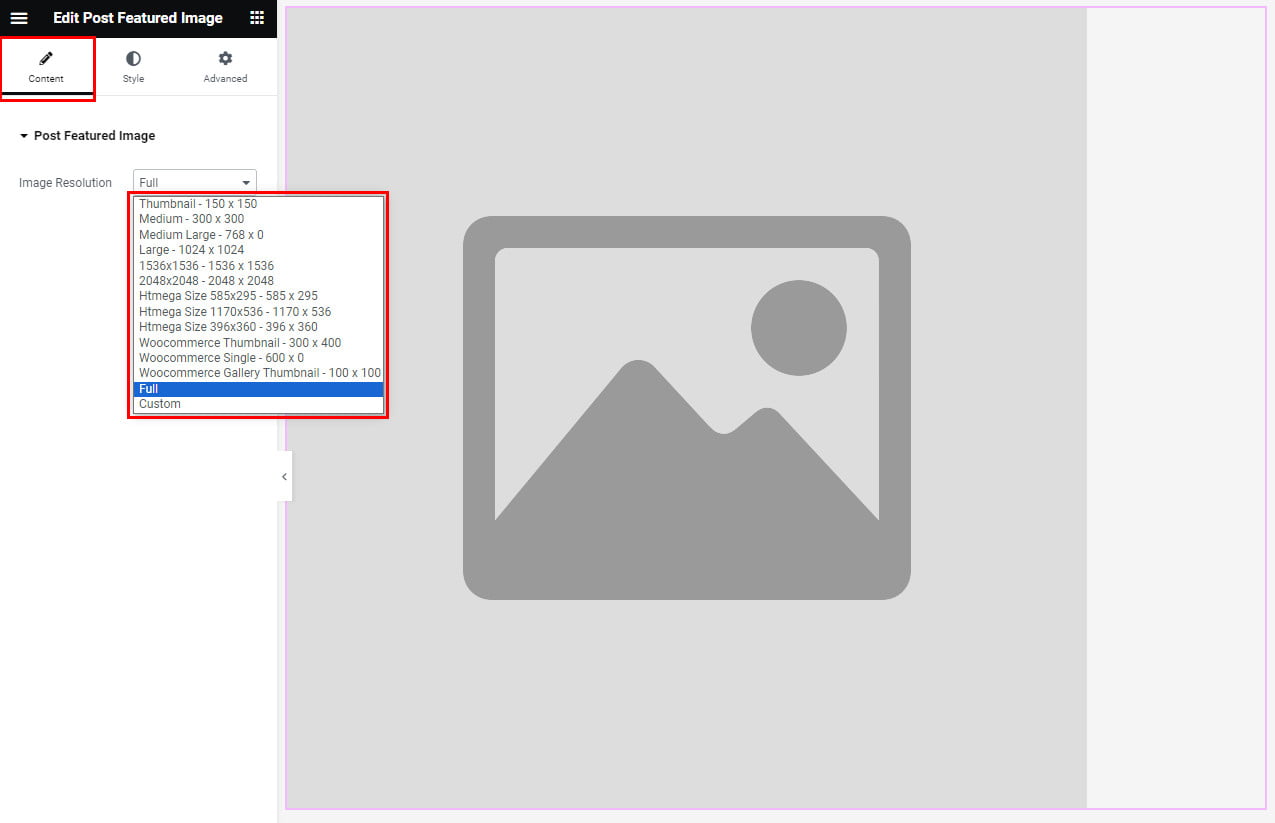
After adding the Post Featured Image widget, navigate to the Content tab. Within this section, locate the Post Featured Image settings. Here, you have the option to select the Image Resolution for your website based on your specific requirements.
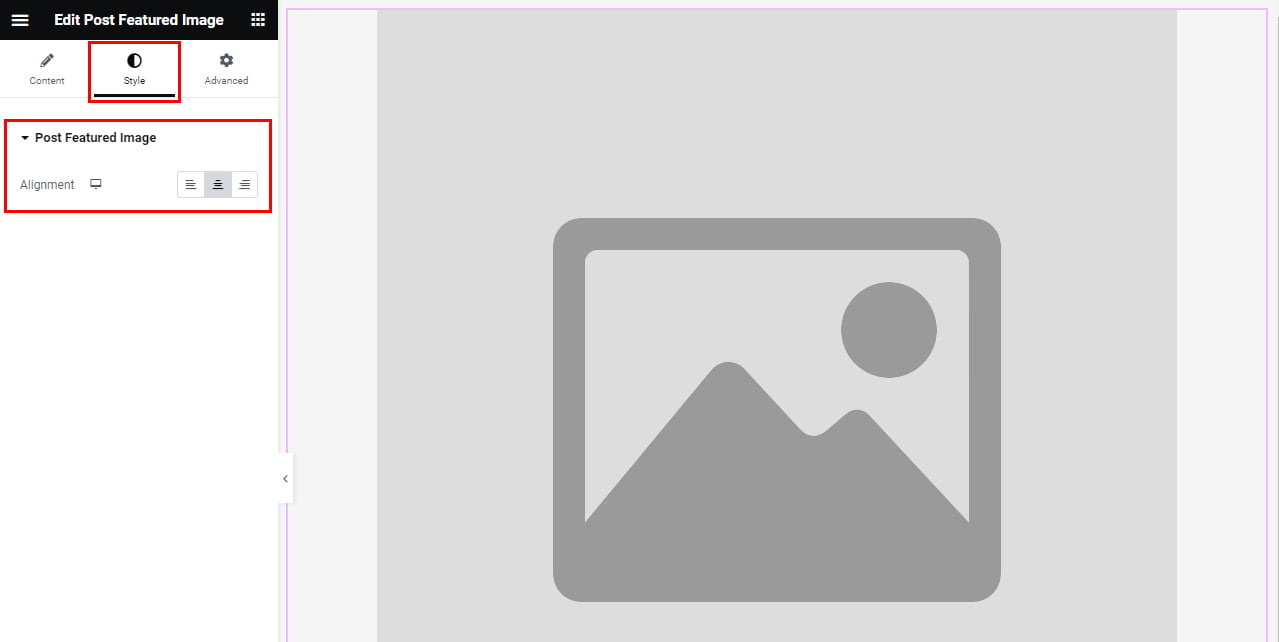
Step 4: How to customize the HT Mega Post Featured Image Widget Style?
In the Style tab, you can align the Post Featured Image according to your preferences.
That’s it! Thank you for choosing HT Mega to enhance your website design and user experience. If you need additional assistance, feel free to contact our support team. Our dedicated support team would be more than happy to assist you.
Was this helpful?
Good job! Please give your positive feedback
How could we improve this post? Please Help us.
