
By using the HT Mega Elementor Post Masonry Widget, you can display posts in a grid layout with masonry and pagination. It has a sleek design that makes it easy to use
Steps of adding Post Masonry Widget
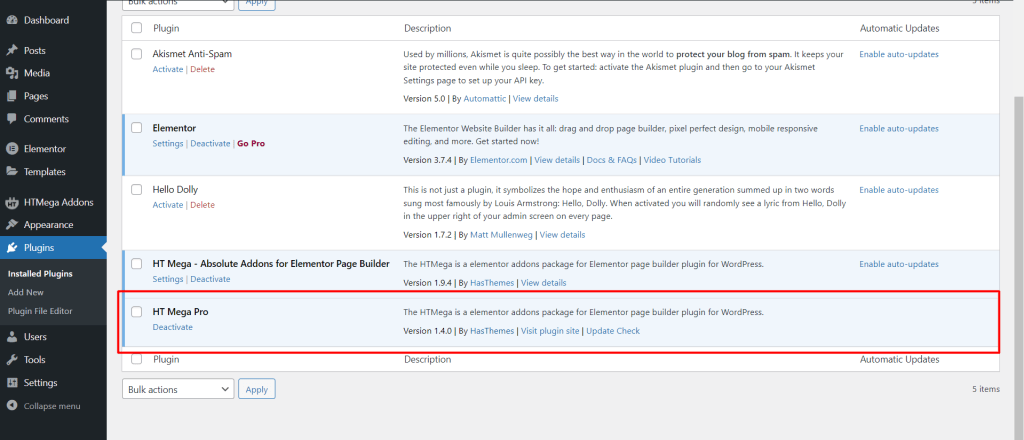
Make sure you have installed and activated the HT Mega Pro.
Step 1: How to Enable Post Masonry Widget?
Go to WordPress Dashboard > HTMega Addons > Settings > Elements. From the list of Elements, enable the “Post Masonry” widget.

Step 2: How to use the Post Masonry Widget?
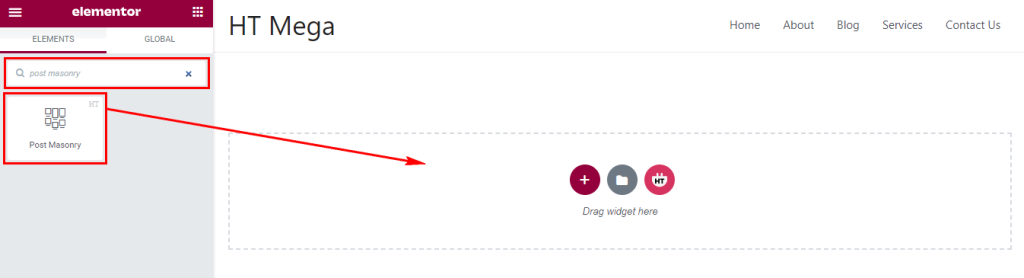
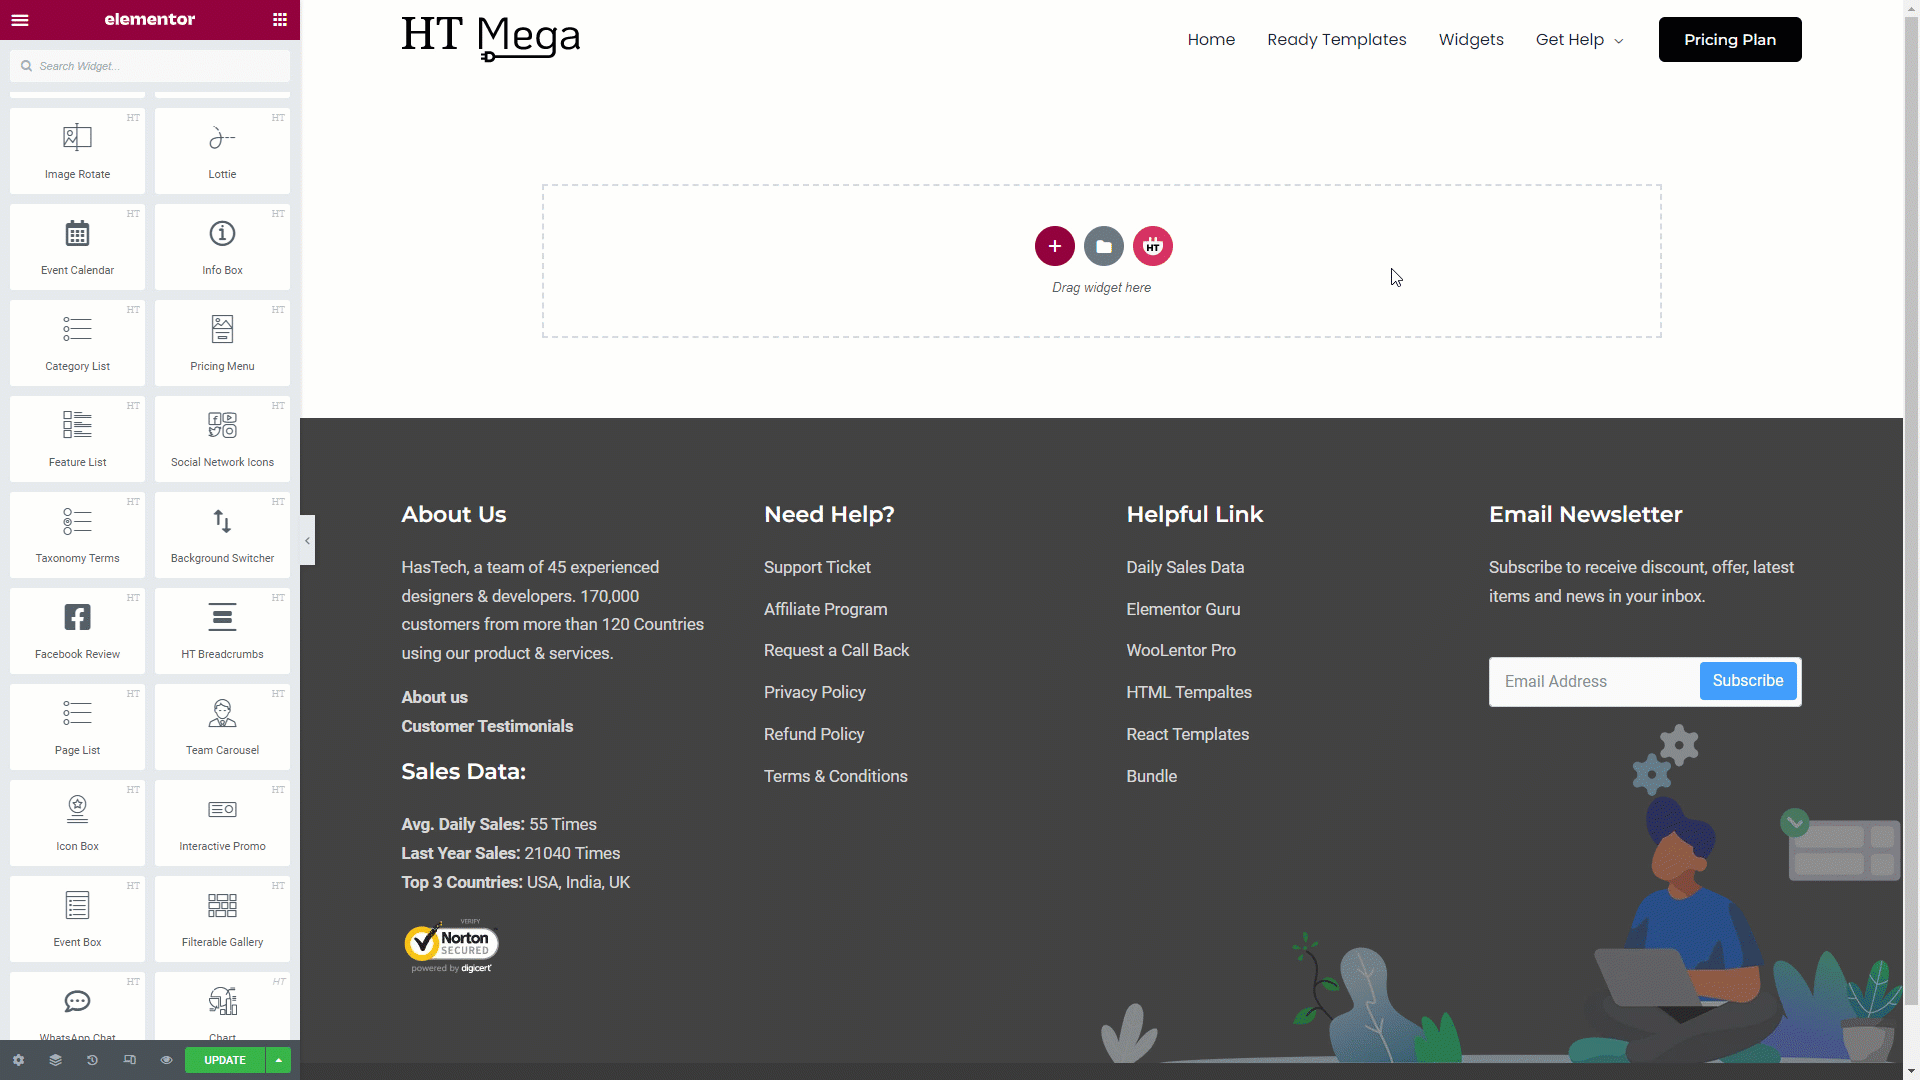
To add the Post Masonry Widget, search for “Post Masonry” then drag and drop the widget that has the “HT” badge.
Step 3: How to customize the Elementor Post Masonry Widget?
Once you add the Post Masonry widget, you will see Content Source and Display Options section under the Content tab. Now, you can update them from here.
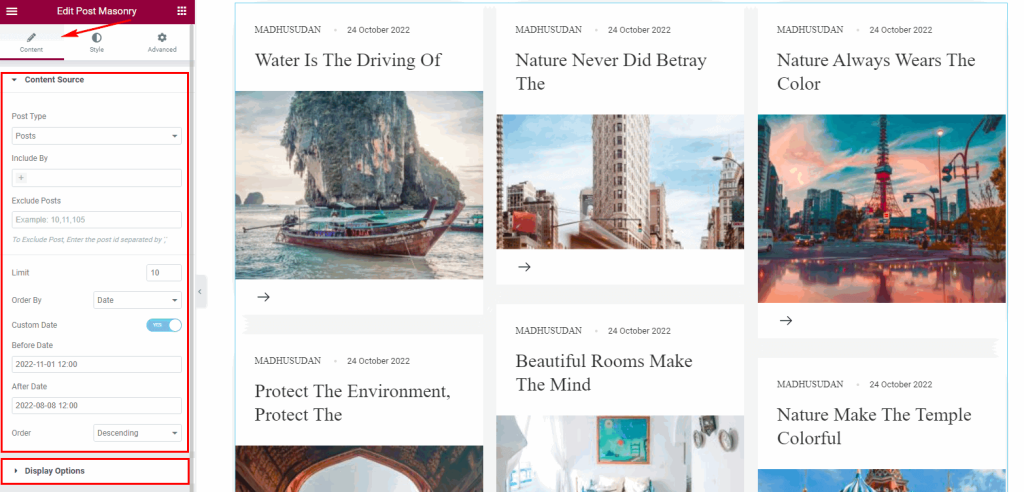
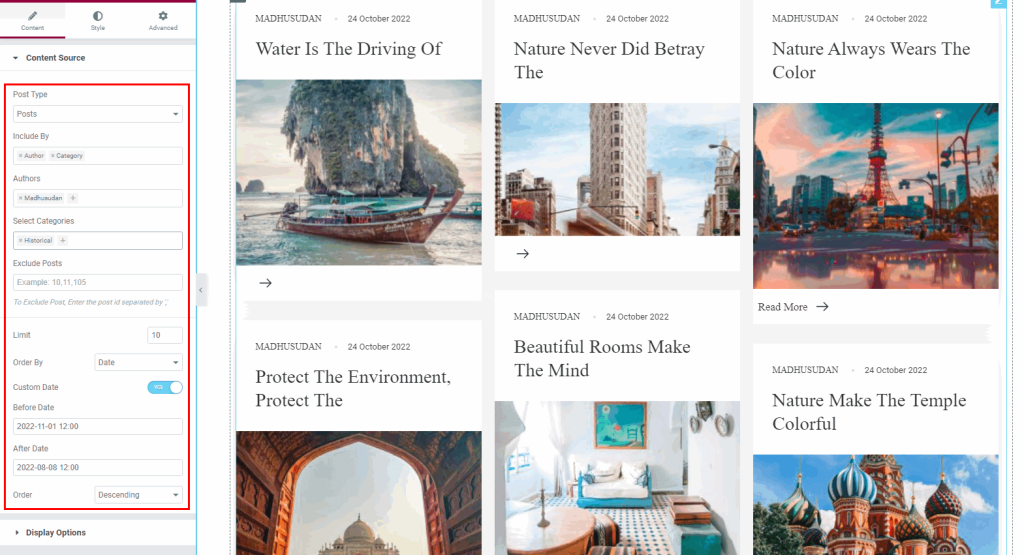
In the Content Source section, you will get options to select Post Type and Post filter options.
- Post Type: Select a post type for the posts you want to show using this post timeline widget.
- Include By: You can include posts by categories and authors.
- Authors: You can select single or multiple authors to show their posts.
- Select Categories: You can choose single or multiple categories to filter post.
- Exclude Posts: If you do not want to show certain post, add the post ID here separated by ” , “.
- Limit: How many post you want to display, set the posts limit.
- Order By: You can display posts order by ID, Date, Name, Title, Comment Count and Random.
- Custom Date: To set the custom date, select the Order By option Date, then you will get the option to set a custom date.
- Order: You can show post order by Descending or Ascending order.
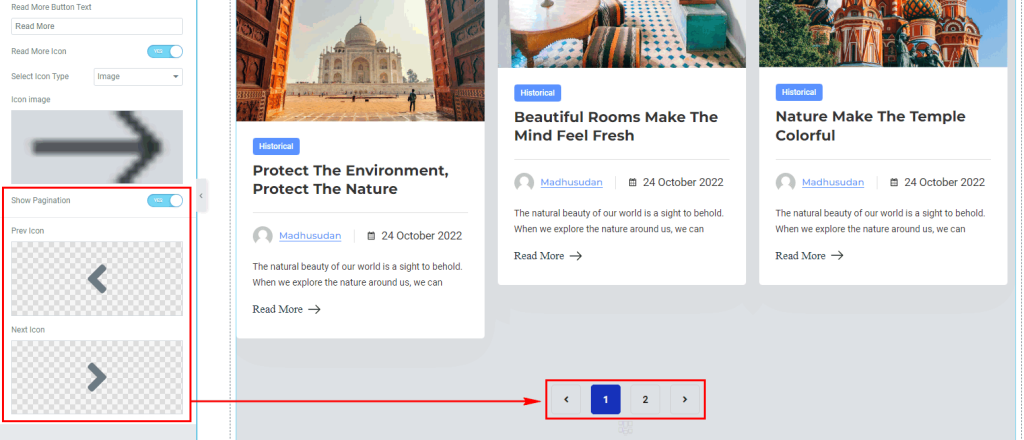
In the Display Options section, you can configure the Category, Date, Title, Title Length, Content, Content length, Read More Button with Button text, Pagination and many more as per your needs.
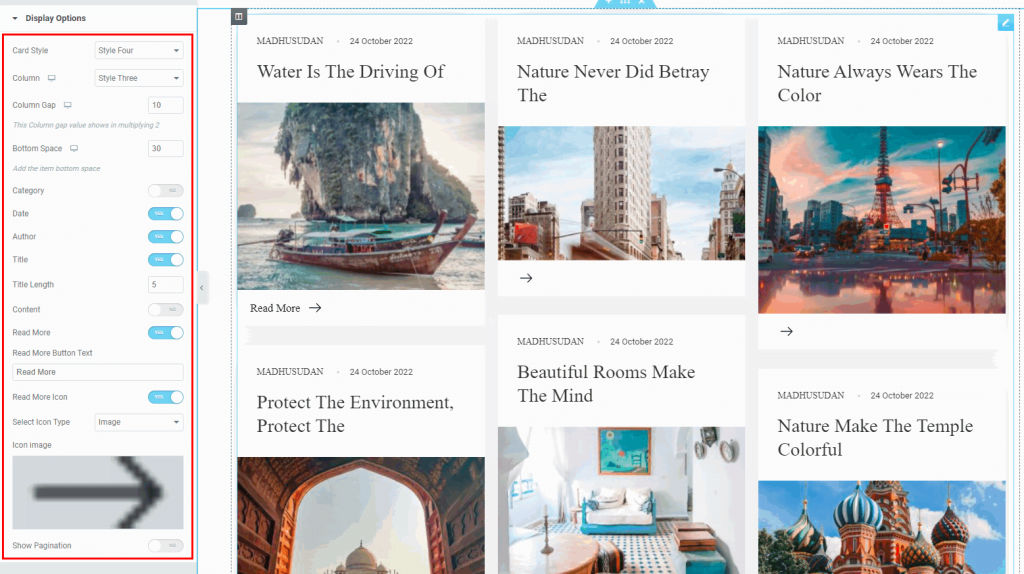
After enabling the Show Pagination switcher, you can get option to select pagination Next and Previous Icon change options.
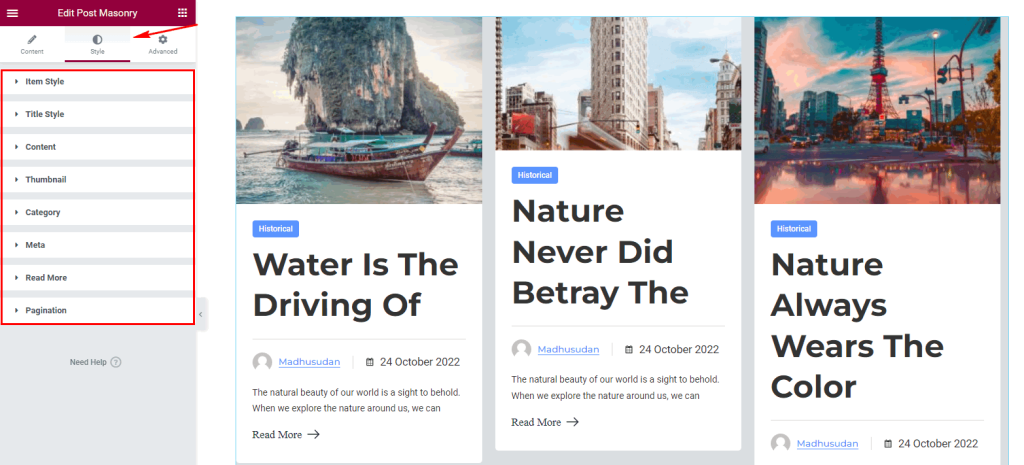
Step 4: How to customize the Elementor Post Masonry Widget Style?
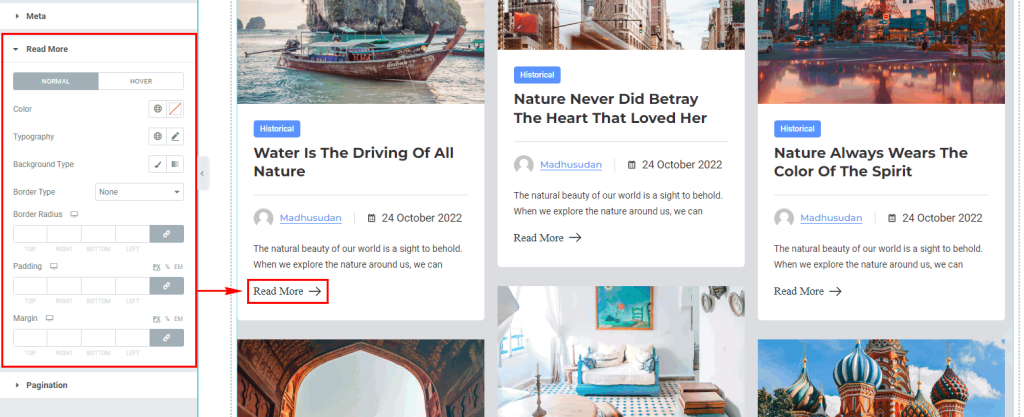
In Style tab you can update Item, Title, Content, Thumbnail, Category, Meta, Read More, and Pagination style according to your needs.
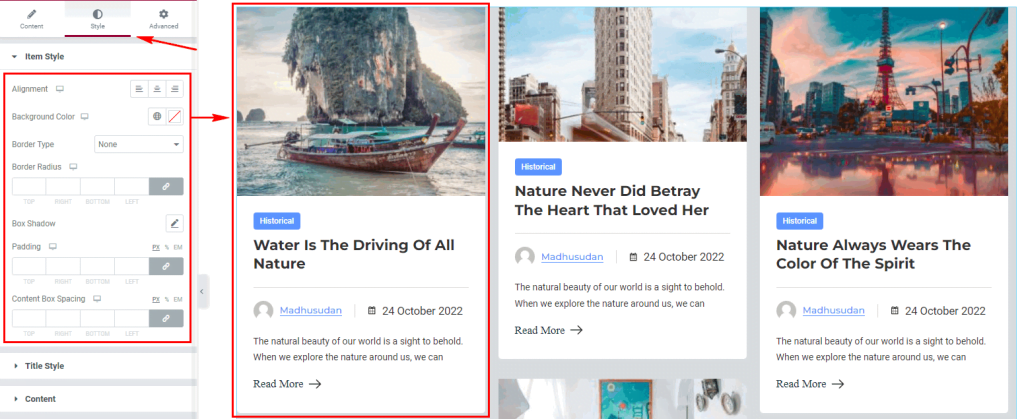
In the Item Style section, you can change Item Alignment, Padding, Background Color, Border, Border Radius, Box Shadow, Content Box Spacing and many more.
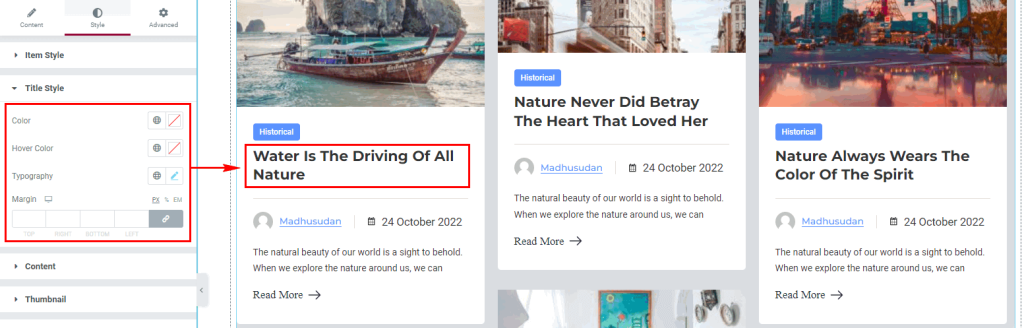
In the Title Style section, you can change Title Color, Hover Color, Typography and Margin Control.
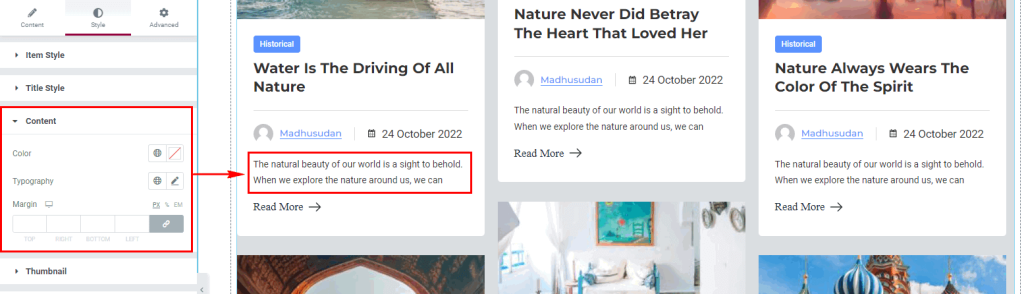
In the Content section, you can change Content Color, Typography and Margin Control.
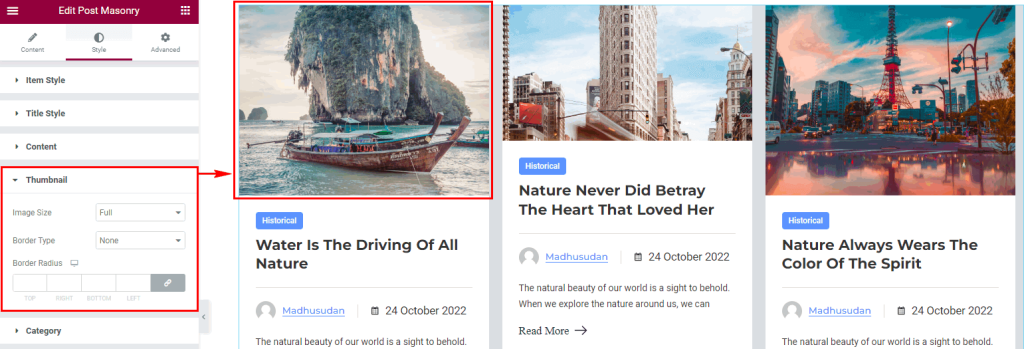
In the Thumbnail section, you can change Thumbnail Size, Border, and Border Radius Control.
In the Category section, you can change Category Color, Background, Typography, Padding, Margin, Border Radius Control, Hover Color and Hover Background Color.

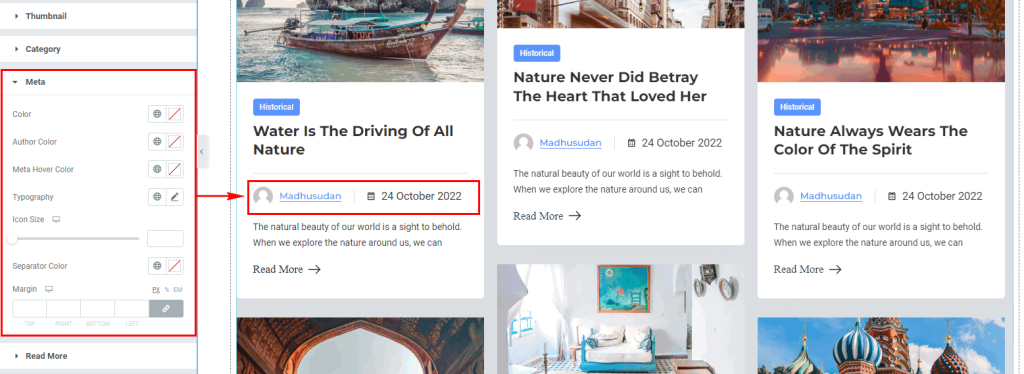
In the Meta section, you can change Meta Color, Typography, Margin, Separator Color, and Hover Color.
In the Read More section, you can change Read More Button Color, Background, Typography, Padding, Margin, Border, Border Radius Control, Hover Color and Hover Background Color.
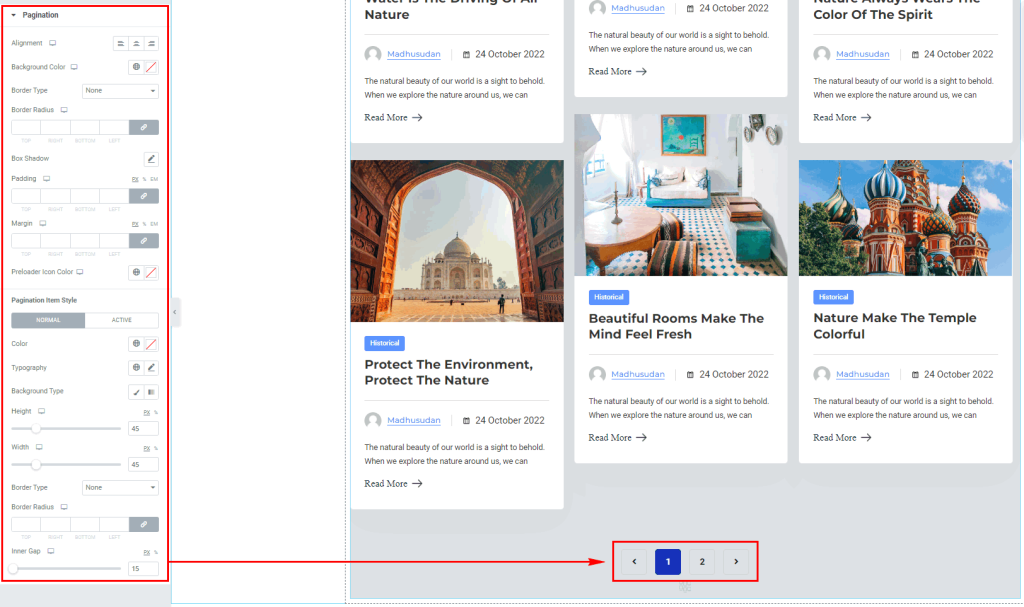
In the Pagination section, you can change Color, Background, Padding, Inner Gap, Border, Border Radius, Height, Width, Position and Active Color.
Usage Examples
Here are some live use cases for the Elementor Post Masonry Addon. Follow this link to see more Demos
Import any section from the above preview with just a few clicks
From our Template library you can import all the blocks / page templates and modify the content as you prefer.
After Importing the Post Masonry Block, you need to update the Content source to show post. Sometimes this widget may not work as expected in Editor mode. But it will work in preview mode perfectly. If that happens, reload the editor mode to solve this.